Fortnite: How To Complete All Vibin' Part 7 Quests
페이지 정보

본문
Quick Links
Establish Device Uplink
Collect 2 Of The Foundation’s Launch Records At Sanctuary
Report To The Foundation At Mighty Monument
Find A Clue For The Foundation’s Whereabouts
Establish Device Uplink
Find The Visitor
Collect 3 Pieces Of Surveillance Footage From Cameras At The Condosseum
Establish Device Uplink
Dance On The Main Dance Floor At Rave Cave For 5 Seconds

Restore 30 Health Or Shields By Destroying Slurp Barrels In Rave Cave
Find A Clue For The Imagined’s Whereabouts
Establish Device Uplink
Talk To Seven Sentry Sven
Talk To Seven Sentry Svenja
Find A Clue To The Order’s Whereabouts
The seventh part of Fortnite’s _ Vibin’ questline is now available, with players able to continue progressing through _Fortnite’s storyline by completing fifteen separate quest objectives. Tasking players with exploring every nook and cranny of the Fortnite island, Vibin’ Part 7 is a particularly time-consuming endeavor, even for the most dedicated Fortnite fans. However, like the previously released parts of the Vibin’ questline, the rewards players can earn from completing Part 7’s quests are excellent, with a total of 141,000XP available for players to collect for their premium Fortnite Battle Passes . While this season of Fortnite is slowly but surely coming to an end, players still have plenty of time to gain a few extra Battle Pass levels and grab Battle Stars to unlock this season’s best skins, including Darth Vader and Indiana Jones.
Vibin’ has offered many experience points for players who’ve kept up with it so far, completing an eclectic collection of quest objectives that task players with exploration, combat, and puzzle-solving. To access Part 7 of Vibin’, players must complete the first six parts of the questline, as all the Vibin’ quests can only be completed in sequence one after another. This involves completing dozens of objectives on a whirlwind tour of the Fortnite island, interacting with various NPCs, and even battling with the Sith Lord Darth Vader.

Related: How to Get Darth Vader's Lightsaber in Fortnite Chapter 3 Season 3
After completing Fortnite Vibin’ Part 6 , players will immediately unlock Part 7. With its fifteen objectives, Part 7 is longer and more arduous than Part 6, but luckily players will be able to quickly start ticking these objectives off their quest lists with a bit of help.
Establish Device Uplink
Close
Like the other parts of the Vibin’ questline, Part 7 starts with players establishing a device uplink. To do this, players must travel to one of three spots around Sanctuary. At all three spots, players will find a blue signal icon that they can run through to complete this objective. It doesn’t matter which spot players choose; Sanctuary isn’t one of the best landing spots on the Fortnite island at the moment, so it isn’t likely they will encounter many enemy players there.
Collect 2 Of The Foundation’s Launch Records At Sanctuary

Close
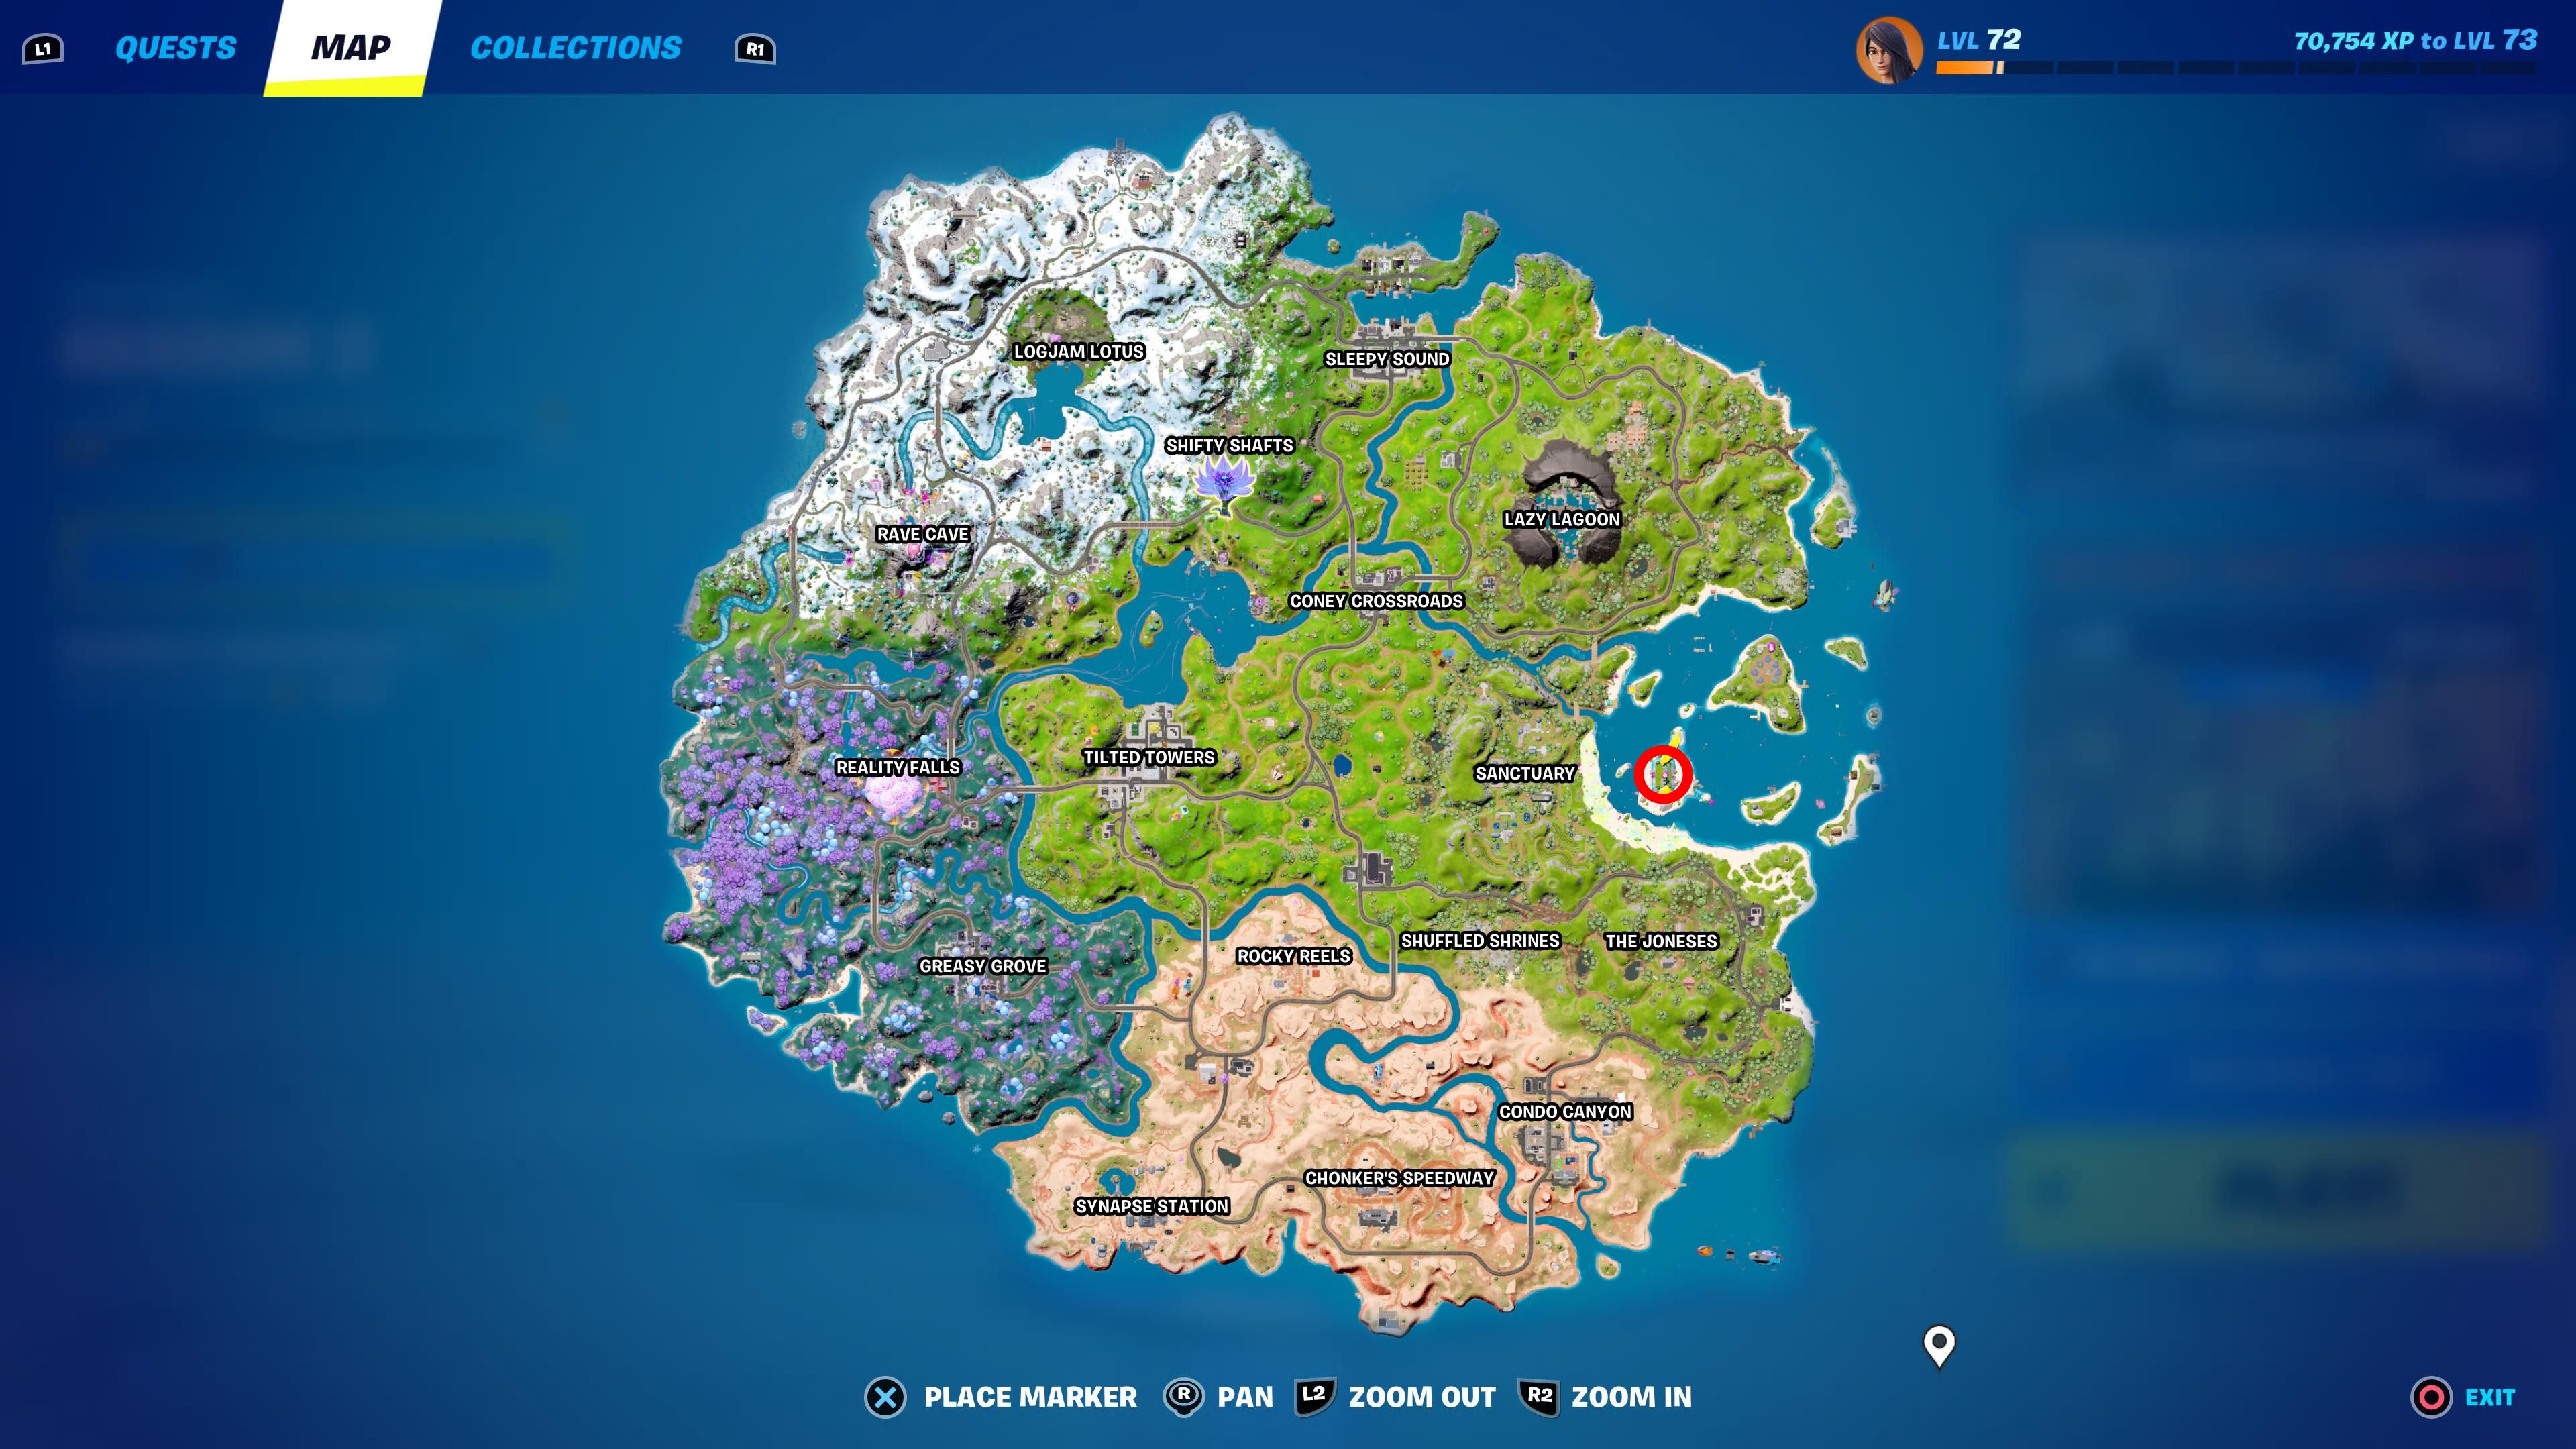
On establishing an uplink, players are then tasked with collecting The Foundation’s Launch Records. These are located inside two different buildings at Sanctuary, as marked on the map above. These buildings usually have some weapons that can be picked up, allowing players to arm up if they haven’t already done so.
Report To The Foundation At Mighty Monument
Close
This quest objective points players to Mighty Monument, referring to the large statue that can be found standing on a small isle in the big lagoon to the east of the Fortnite island. This is only a short sprint away from Sanctuary, so players shouldn’t have trouble getting there.
Related: Every Fortnite Story Video So Far (And What To Expect Next)
It’s best to keep an eye out for other players, however, as several Fortnite weekly quests have objectives requiring players to visit the lagoon.
Find A Clue For The Foundation’s Whereabouts
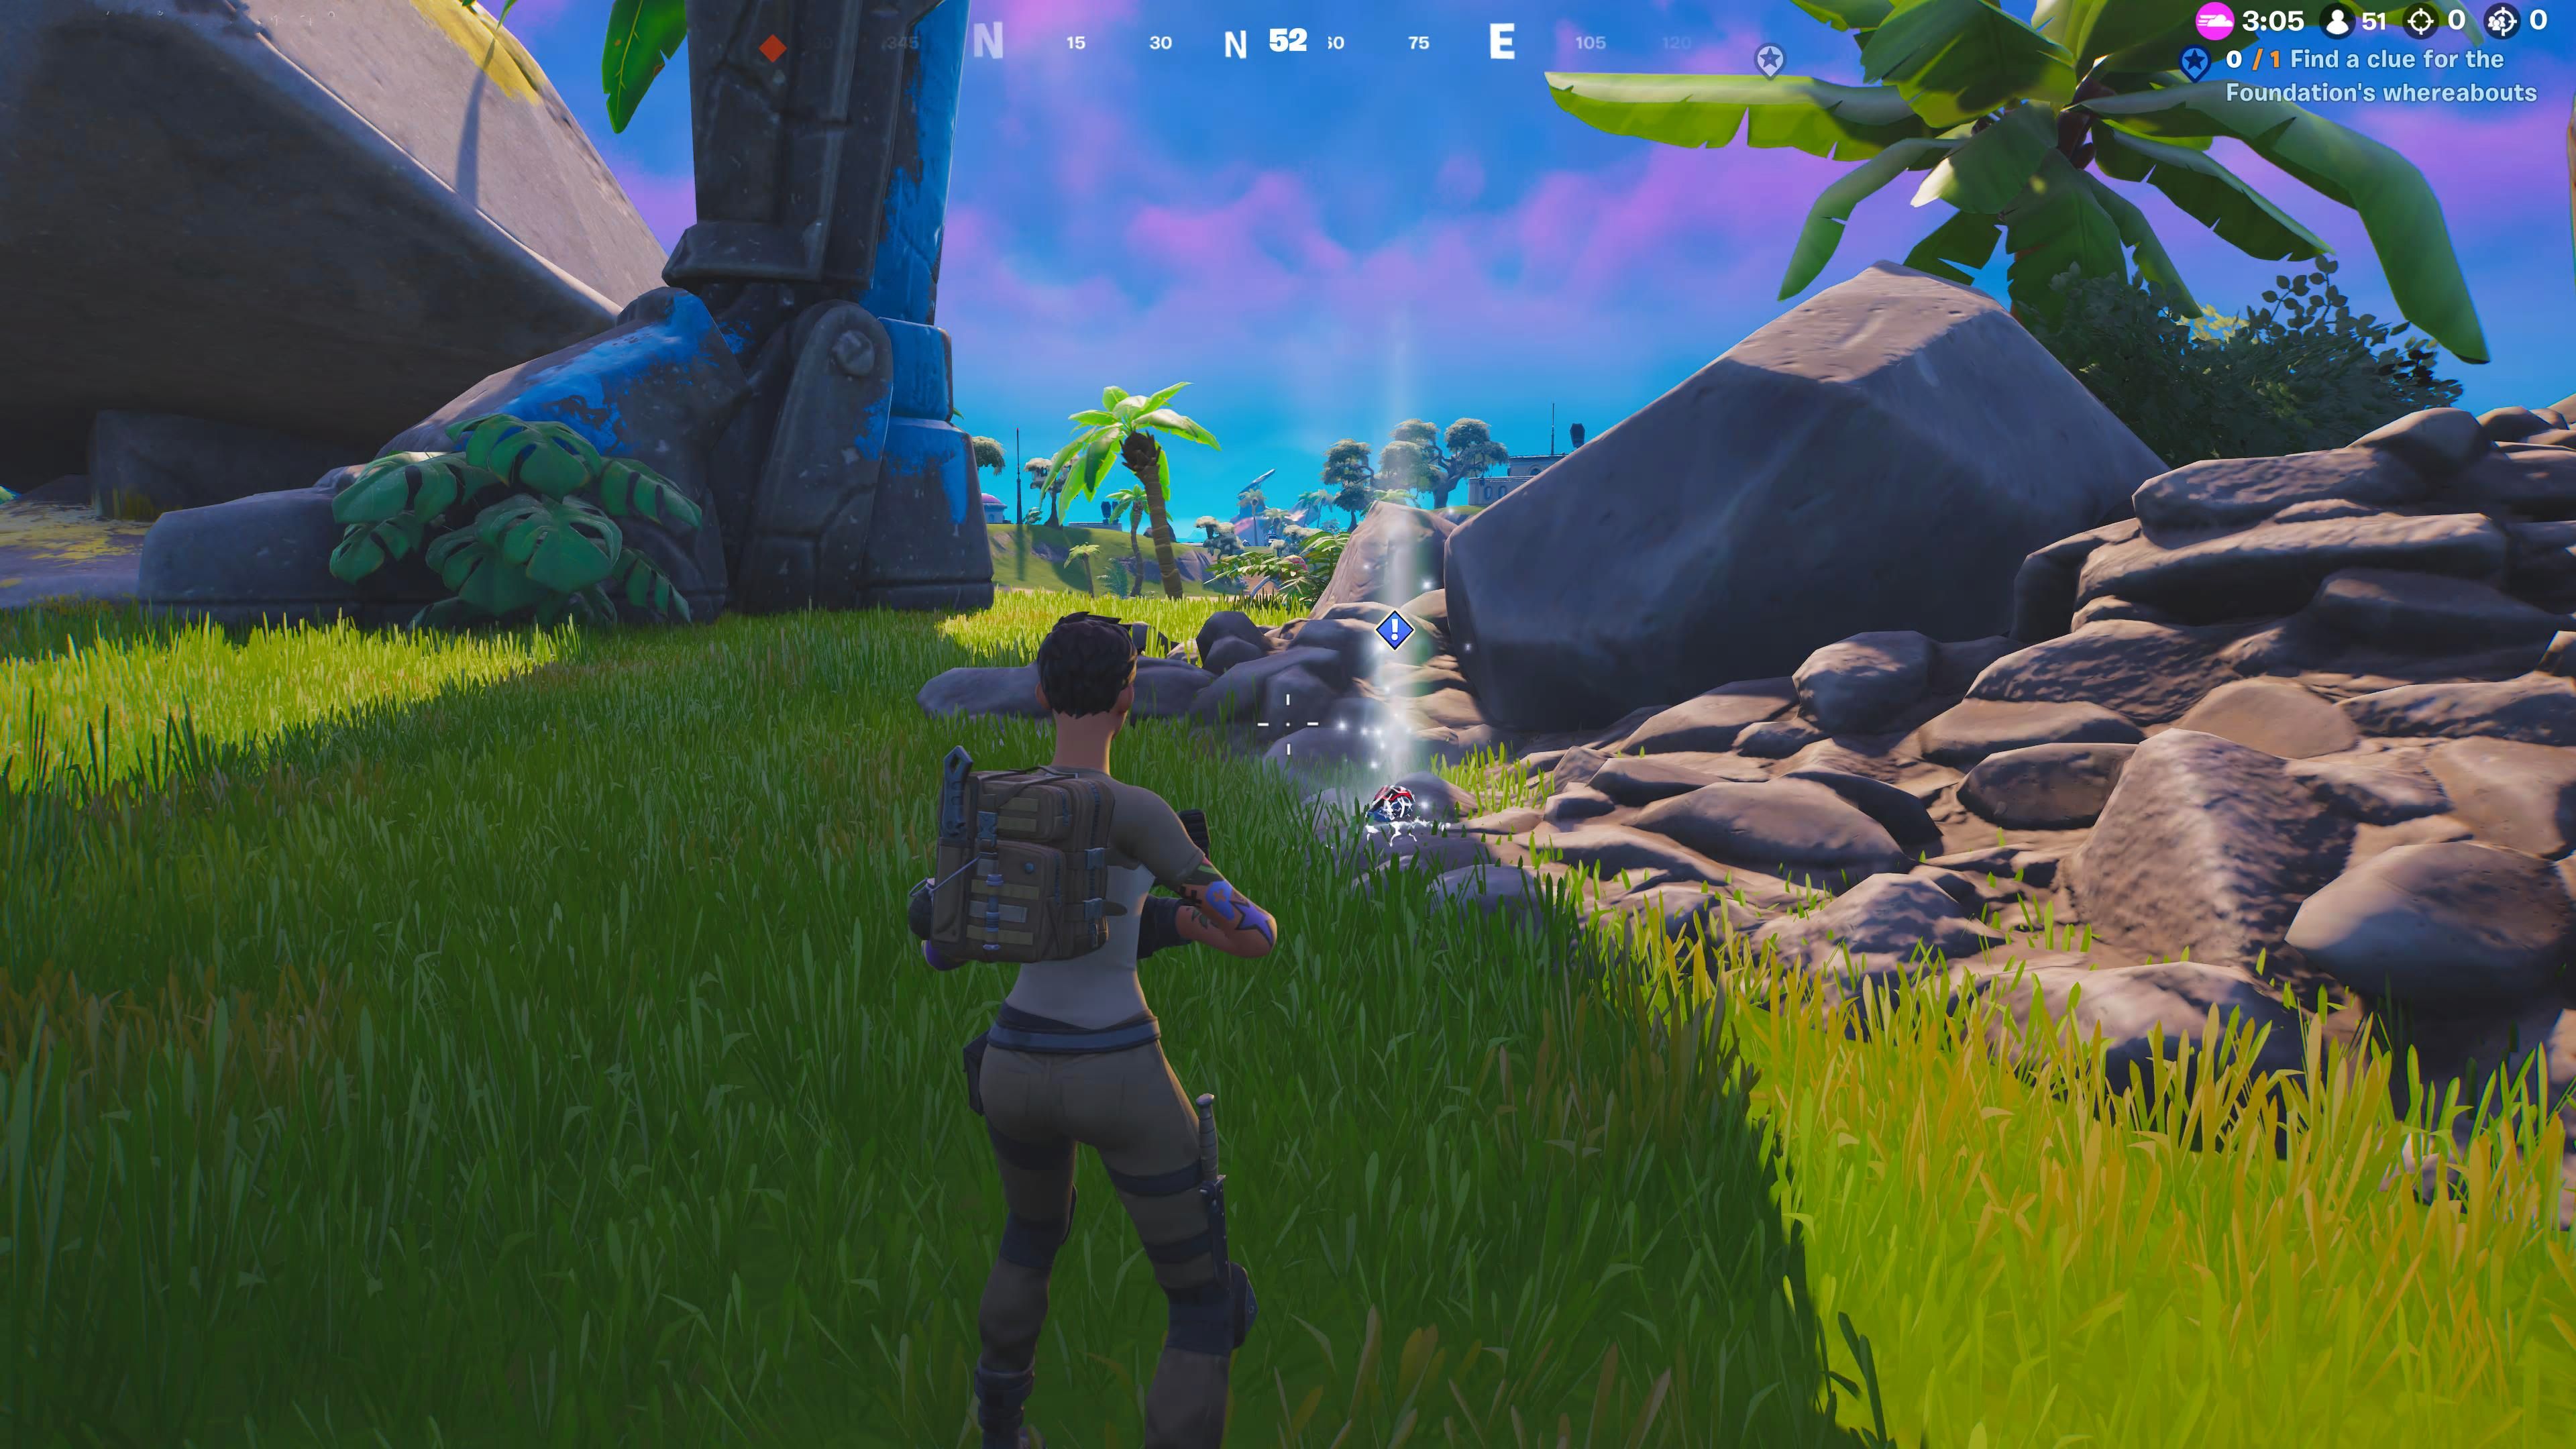
Before players can complete the quest above, however, they will find The Foundation has gone missing from Mighty Monument. So players have to change tack and search for clues hinting at his whereabouts. The clue in question is The Foundation’s mask, which can be found at the base of the statue’s legs.
Establish Device Uplink

Close
At this point, players need to re-establish a device uplink at one of three spots near Condo Canyon. Players might be able to do this in the same match as previous objectives, but this is dependent on where exactly the storm circle is herding survivors. Visiting any of the three spots will do.
Find The Visitor
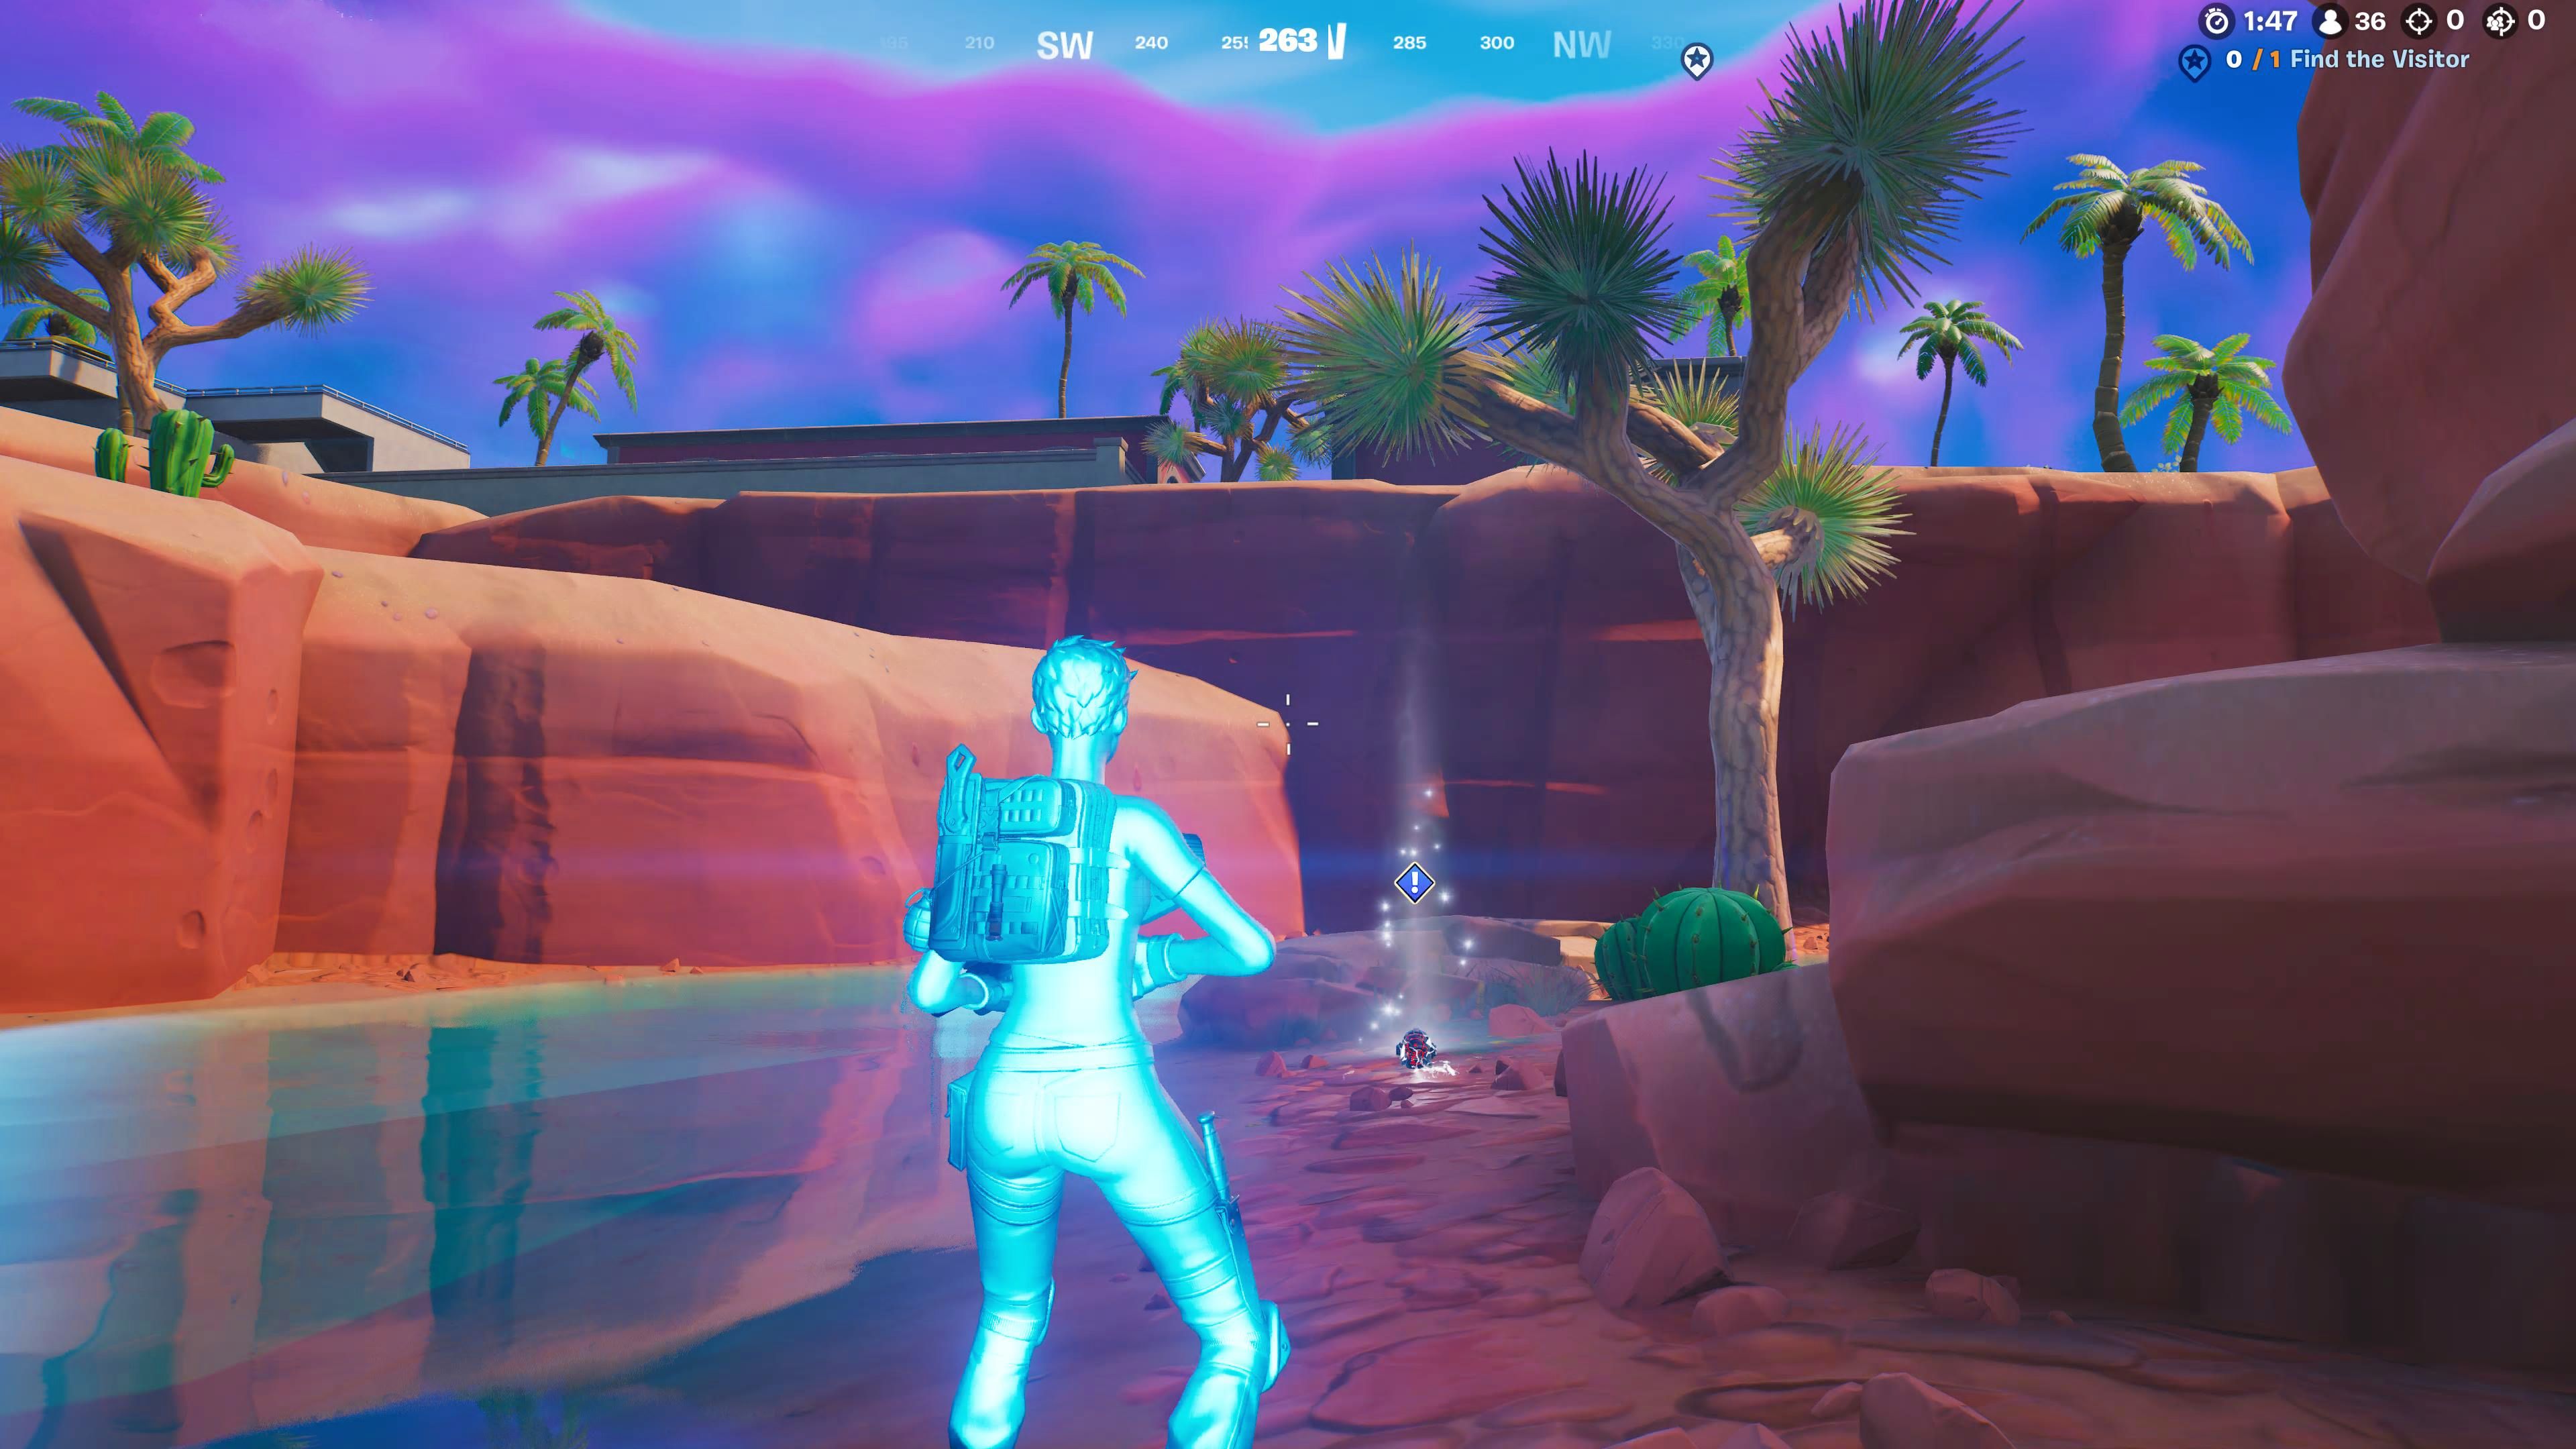
Players must then try and find The Visitor down by the riverbend to the northeast of Condo Canyon, close to one of Fortnite’s most picturesque fishing spots .
Related: Fortnite: How To Find The Coolest Player On The Island
Unfortunately, when they get there, they will find he’s met with the same mysterious fate as his commander. However, only his mask remains, and players should collect it to complete this objective.
Collect 3 Pieces Of Surveillance Footage From Cameras At The Condosseum
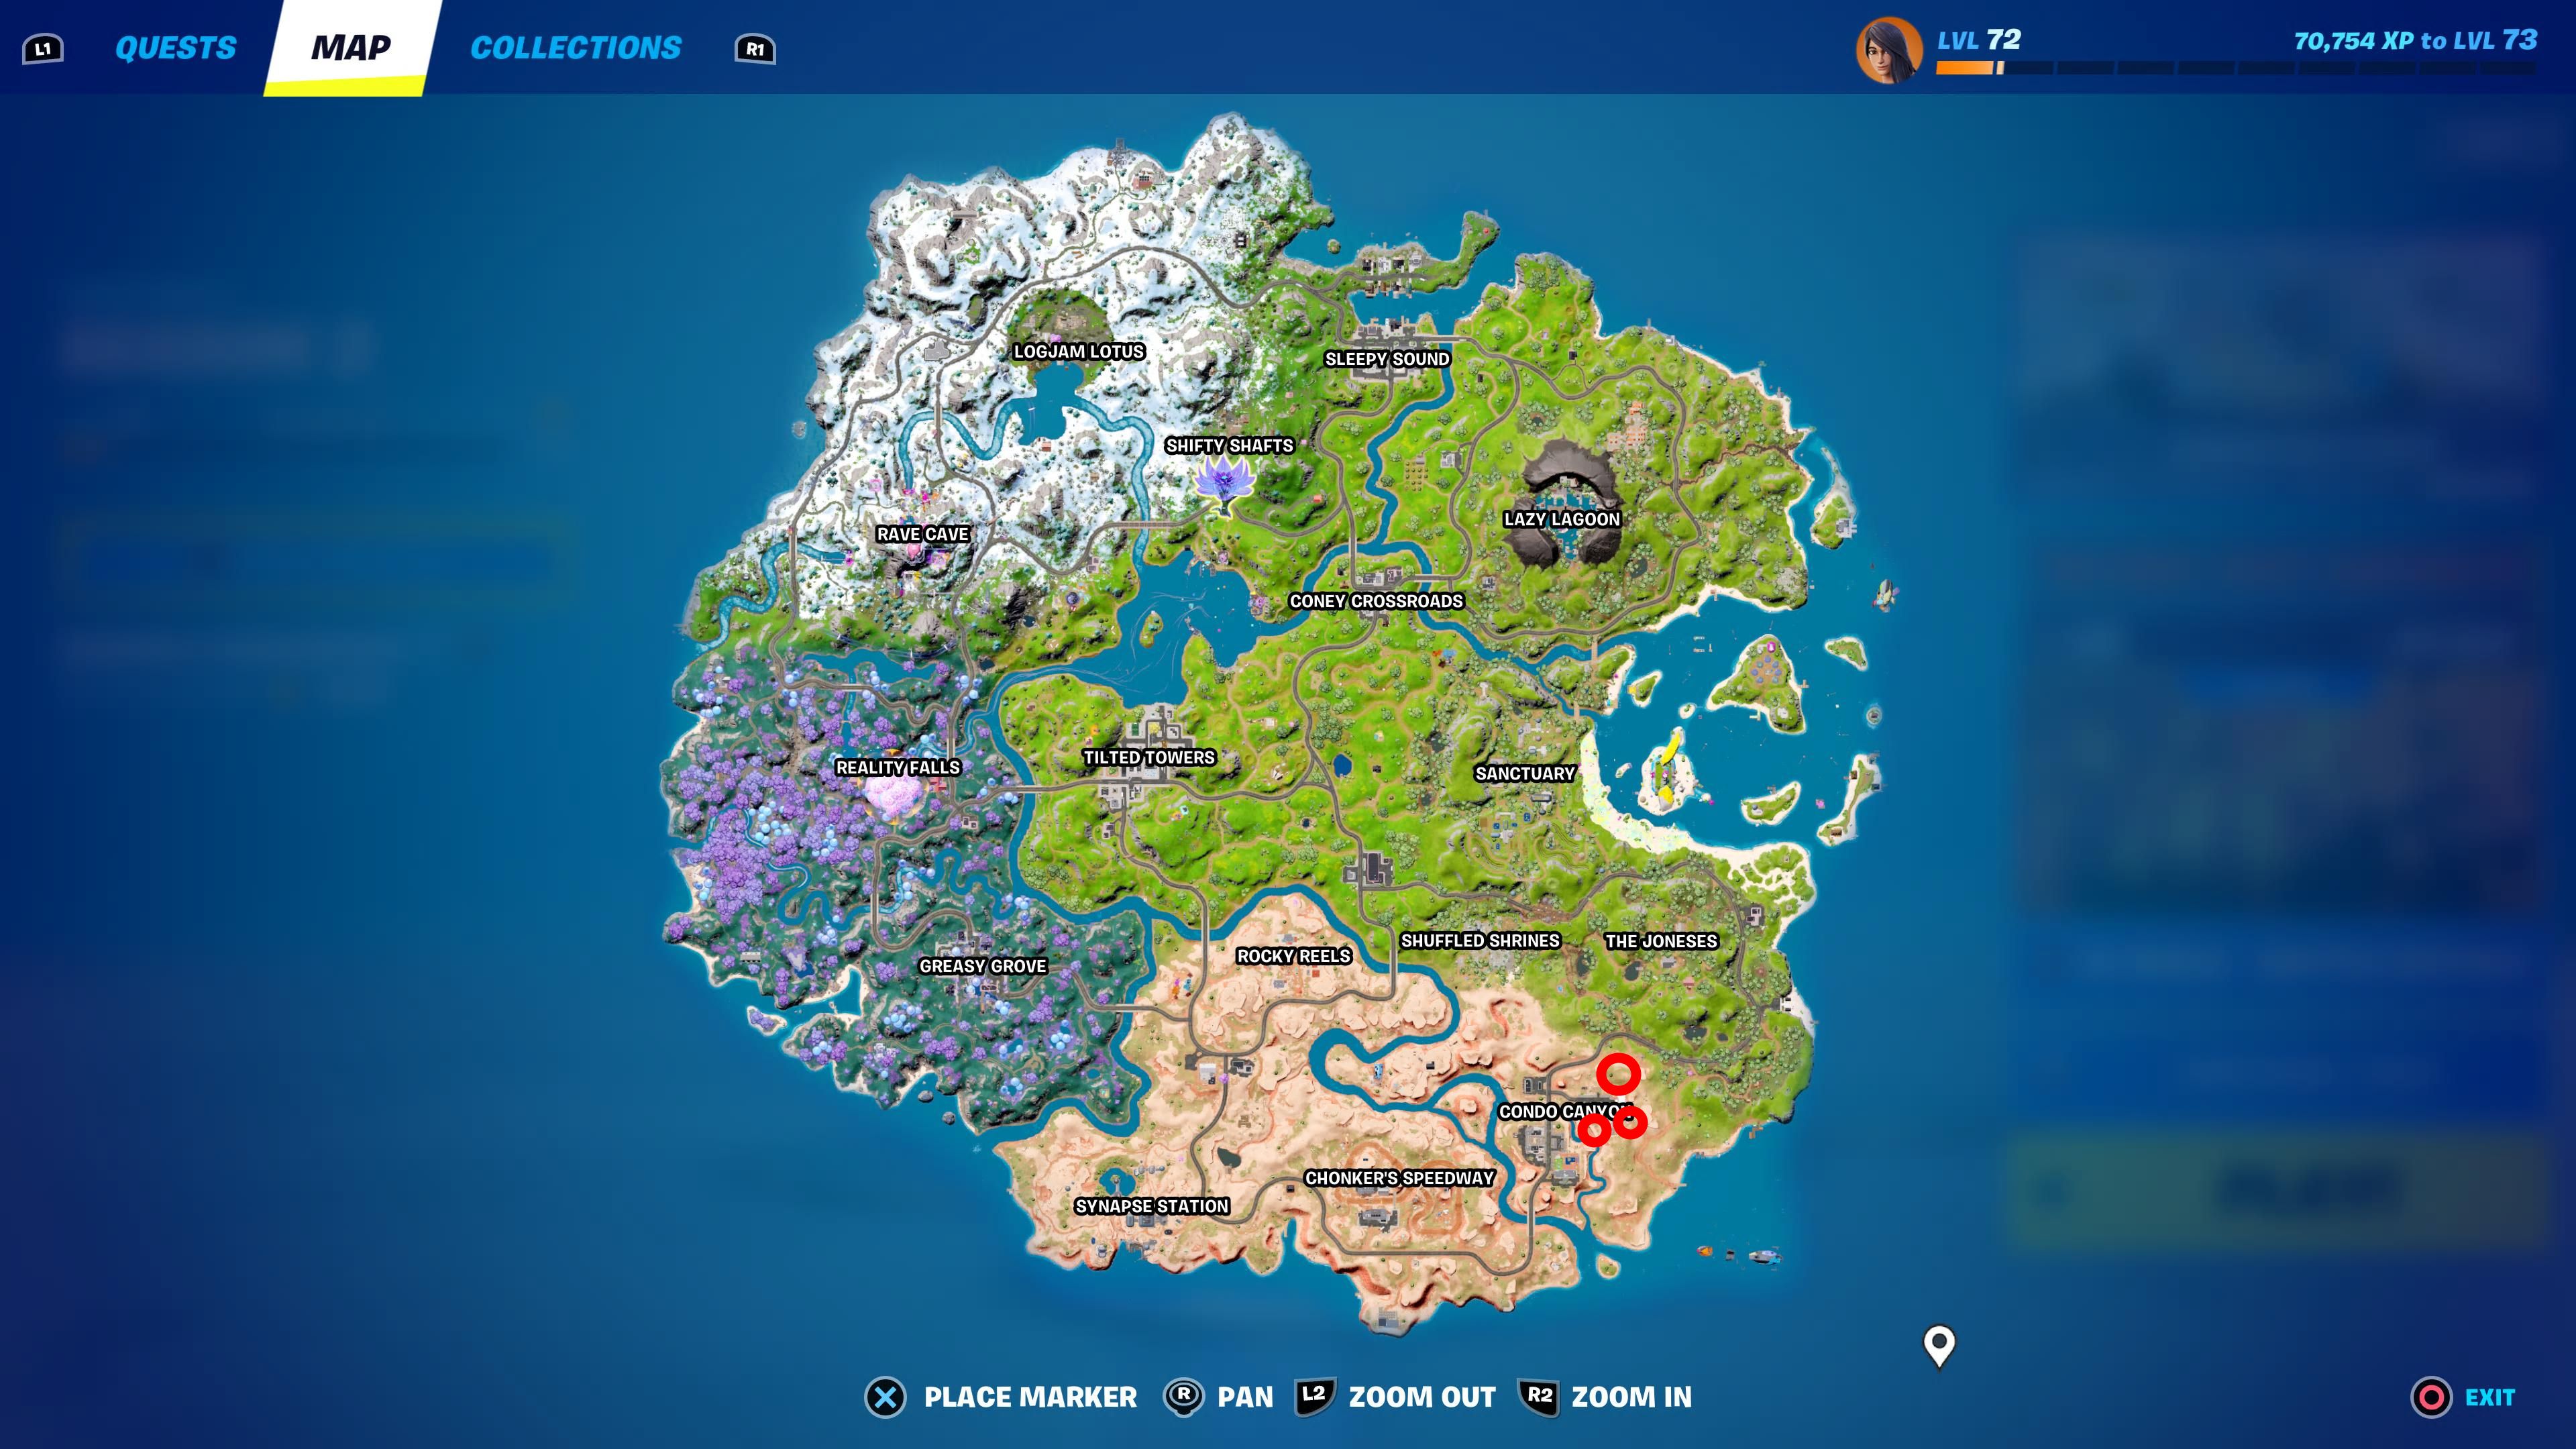
Close
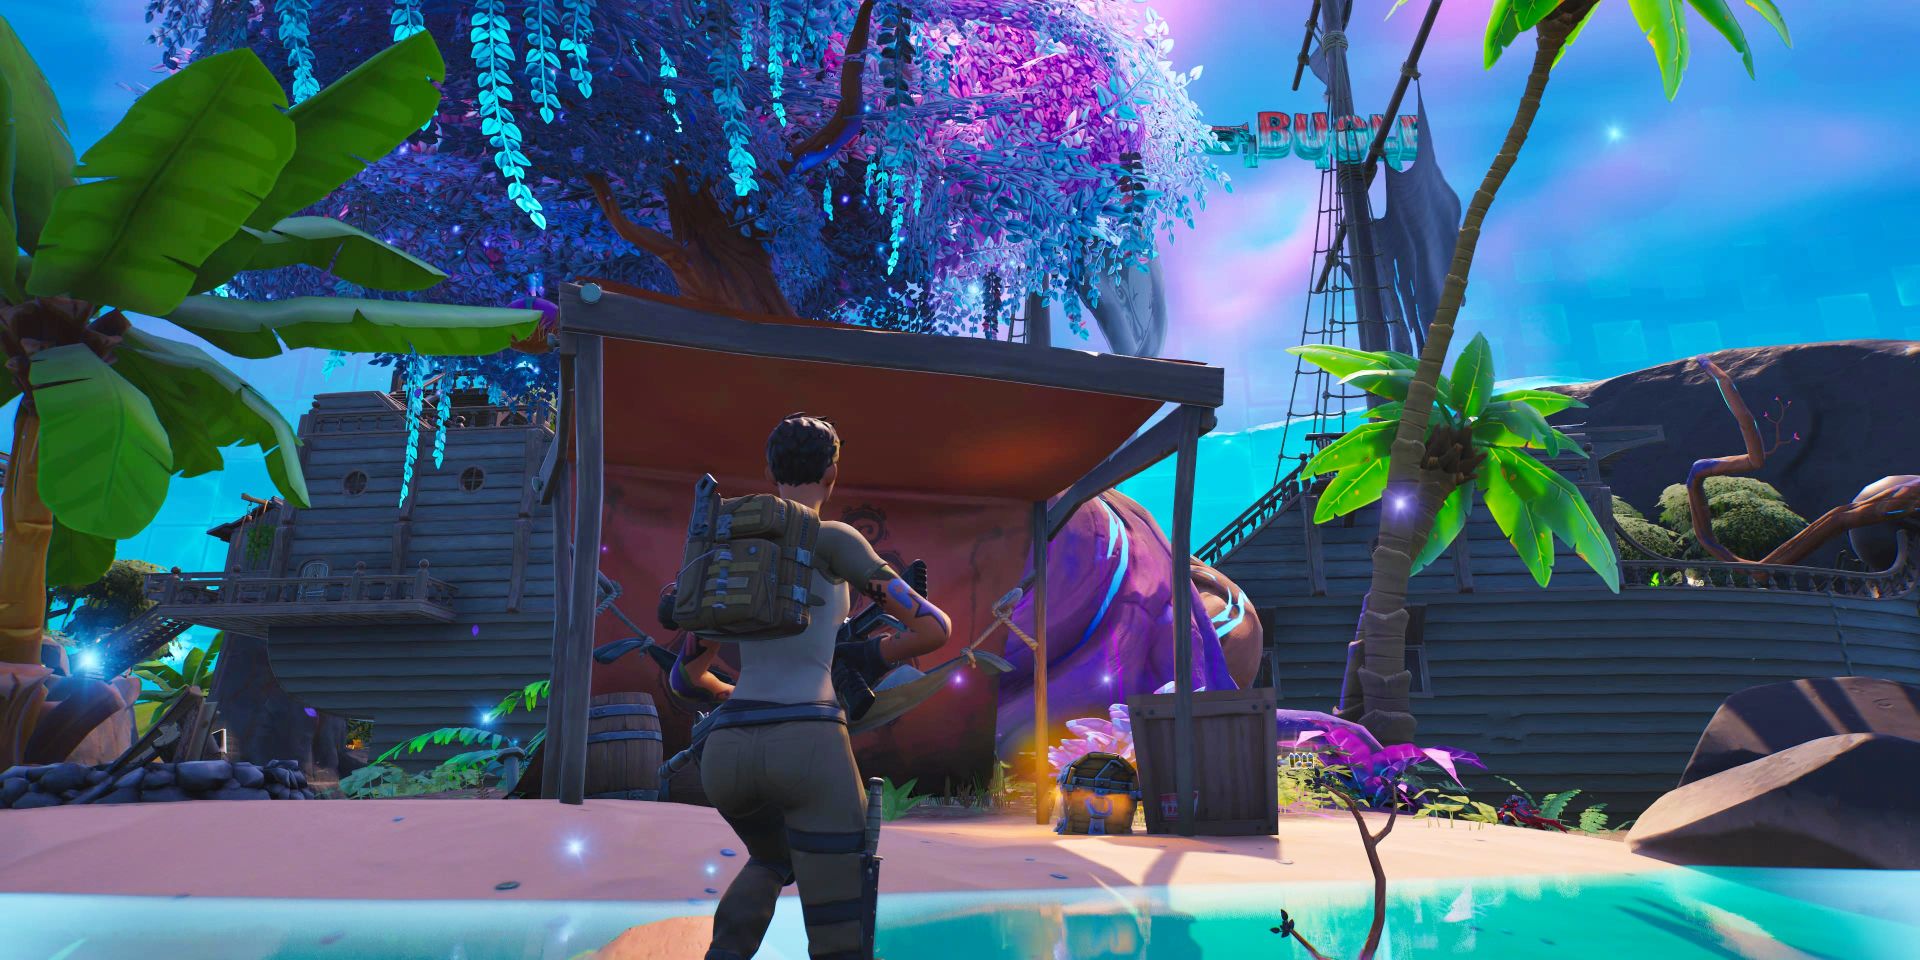
This quest objective tasks players with collecting three reels of surveillance footage from cameras placed around The Condosseum area. Previously known to players as Bungalow Blooms , this area received a recent revamp in the latest Fortnite strategy map refresh. As a result, the Condosseum structure has taken over this area, and players need to track down three separate cameras dotted throughout the Condosseum.
The first camera can be found in the southwestern part of the Condosseum, on a cliff edge facing the river that runs through Condo Canyon. It’s close to a root of the Reality Tree and one of Fortnite’s Reality Seed Pods . The second is directly east of the first, on a gentle slope on the other side of the Condosseum. The third and final camera is located north of the Condosseum towards the highway, as seen on the map above.
Establish Device Uplink
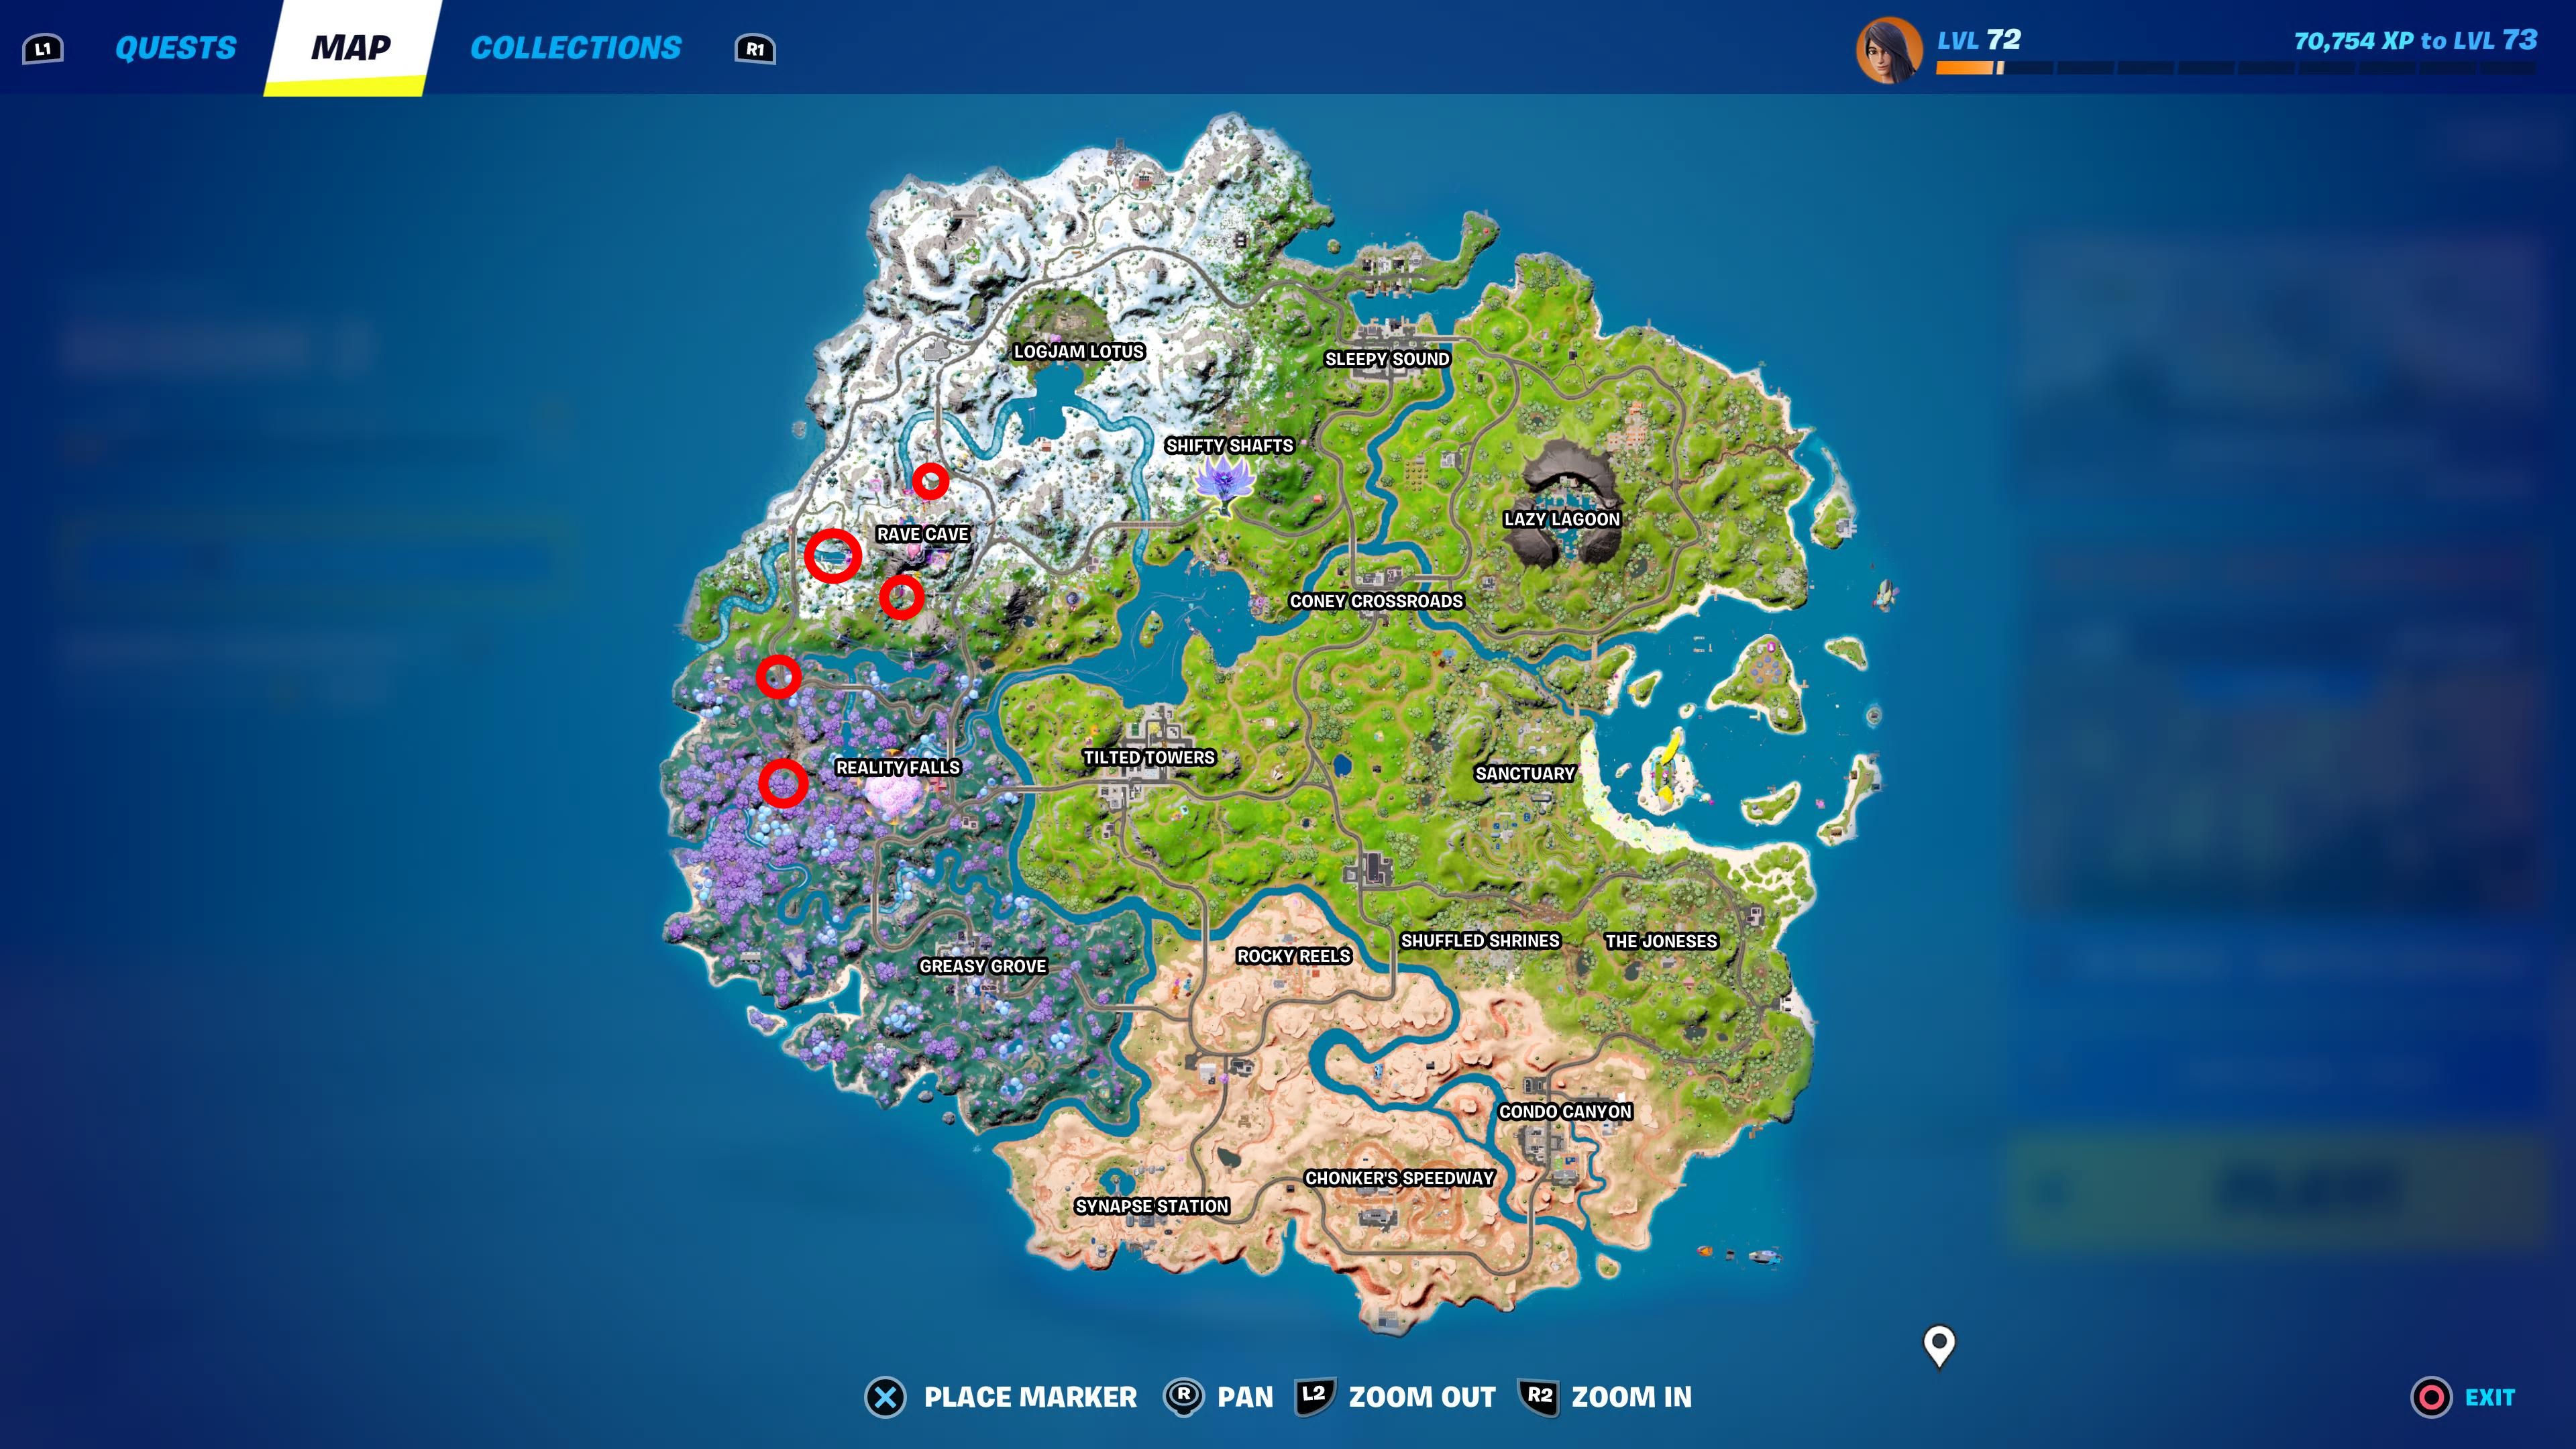
Close
Once again, players will need to establish a device uplink. The focal point for these next few objectives is Rave Cave, a Named Location far to the northwest of the Fortnite island and a long way away from Condo Canyon. There are three spots players can choose to establish their uplink, located north, west, and south of Rave Cave itself.
Related: All Exotic Weapons Locations in Fortnite Chapter 3 Season 3
Either the south or west device uplink locations work best, as these are closest to the next Vibin’ quest objective.
Dance On The Main Dance Floor At Rave Cave For 5 Seconds
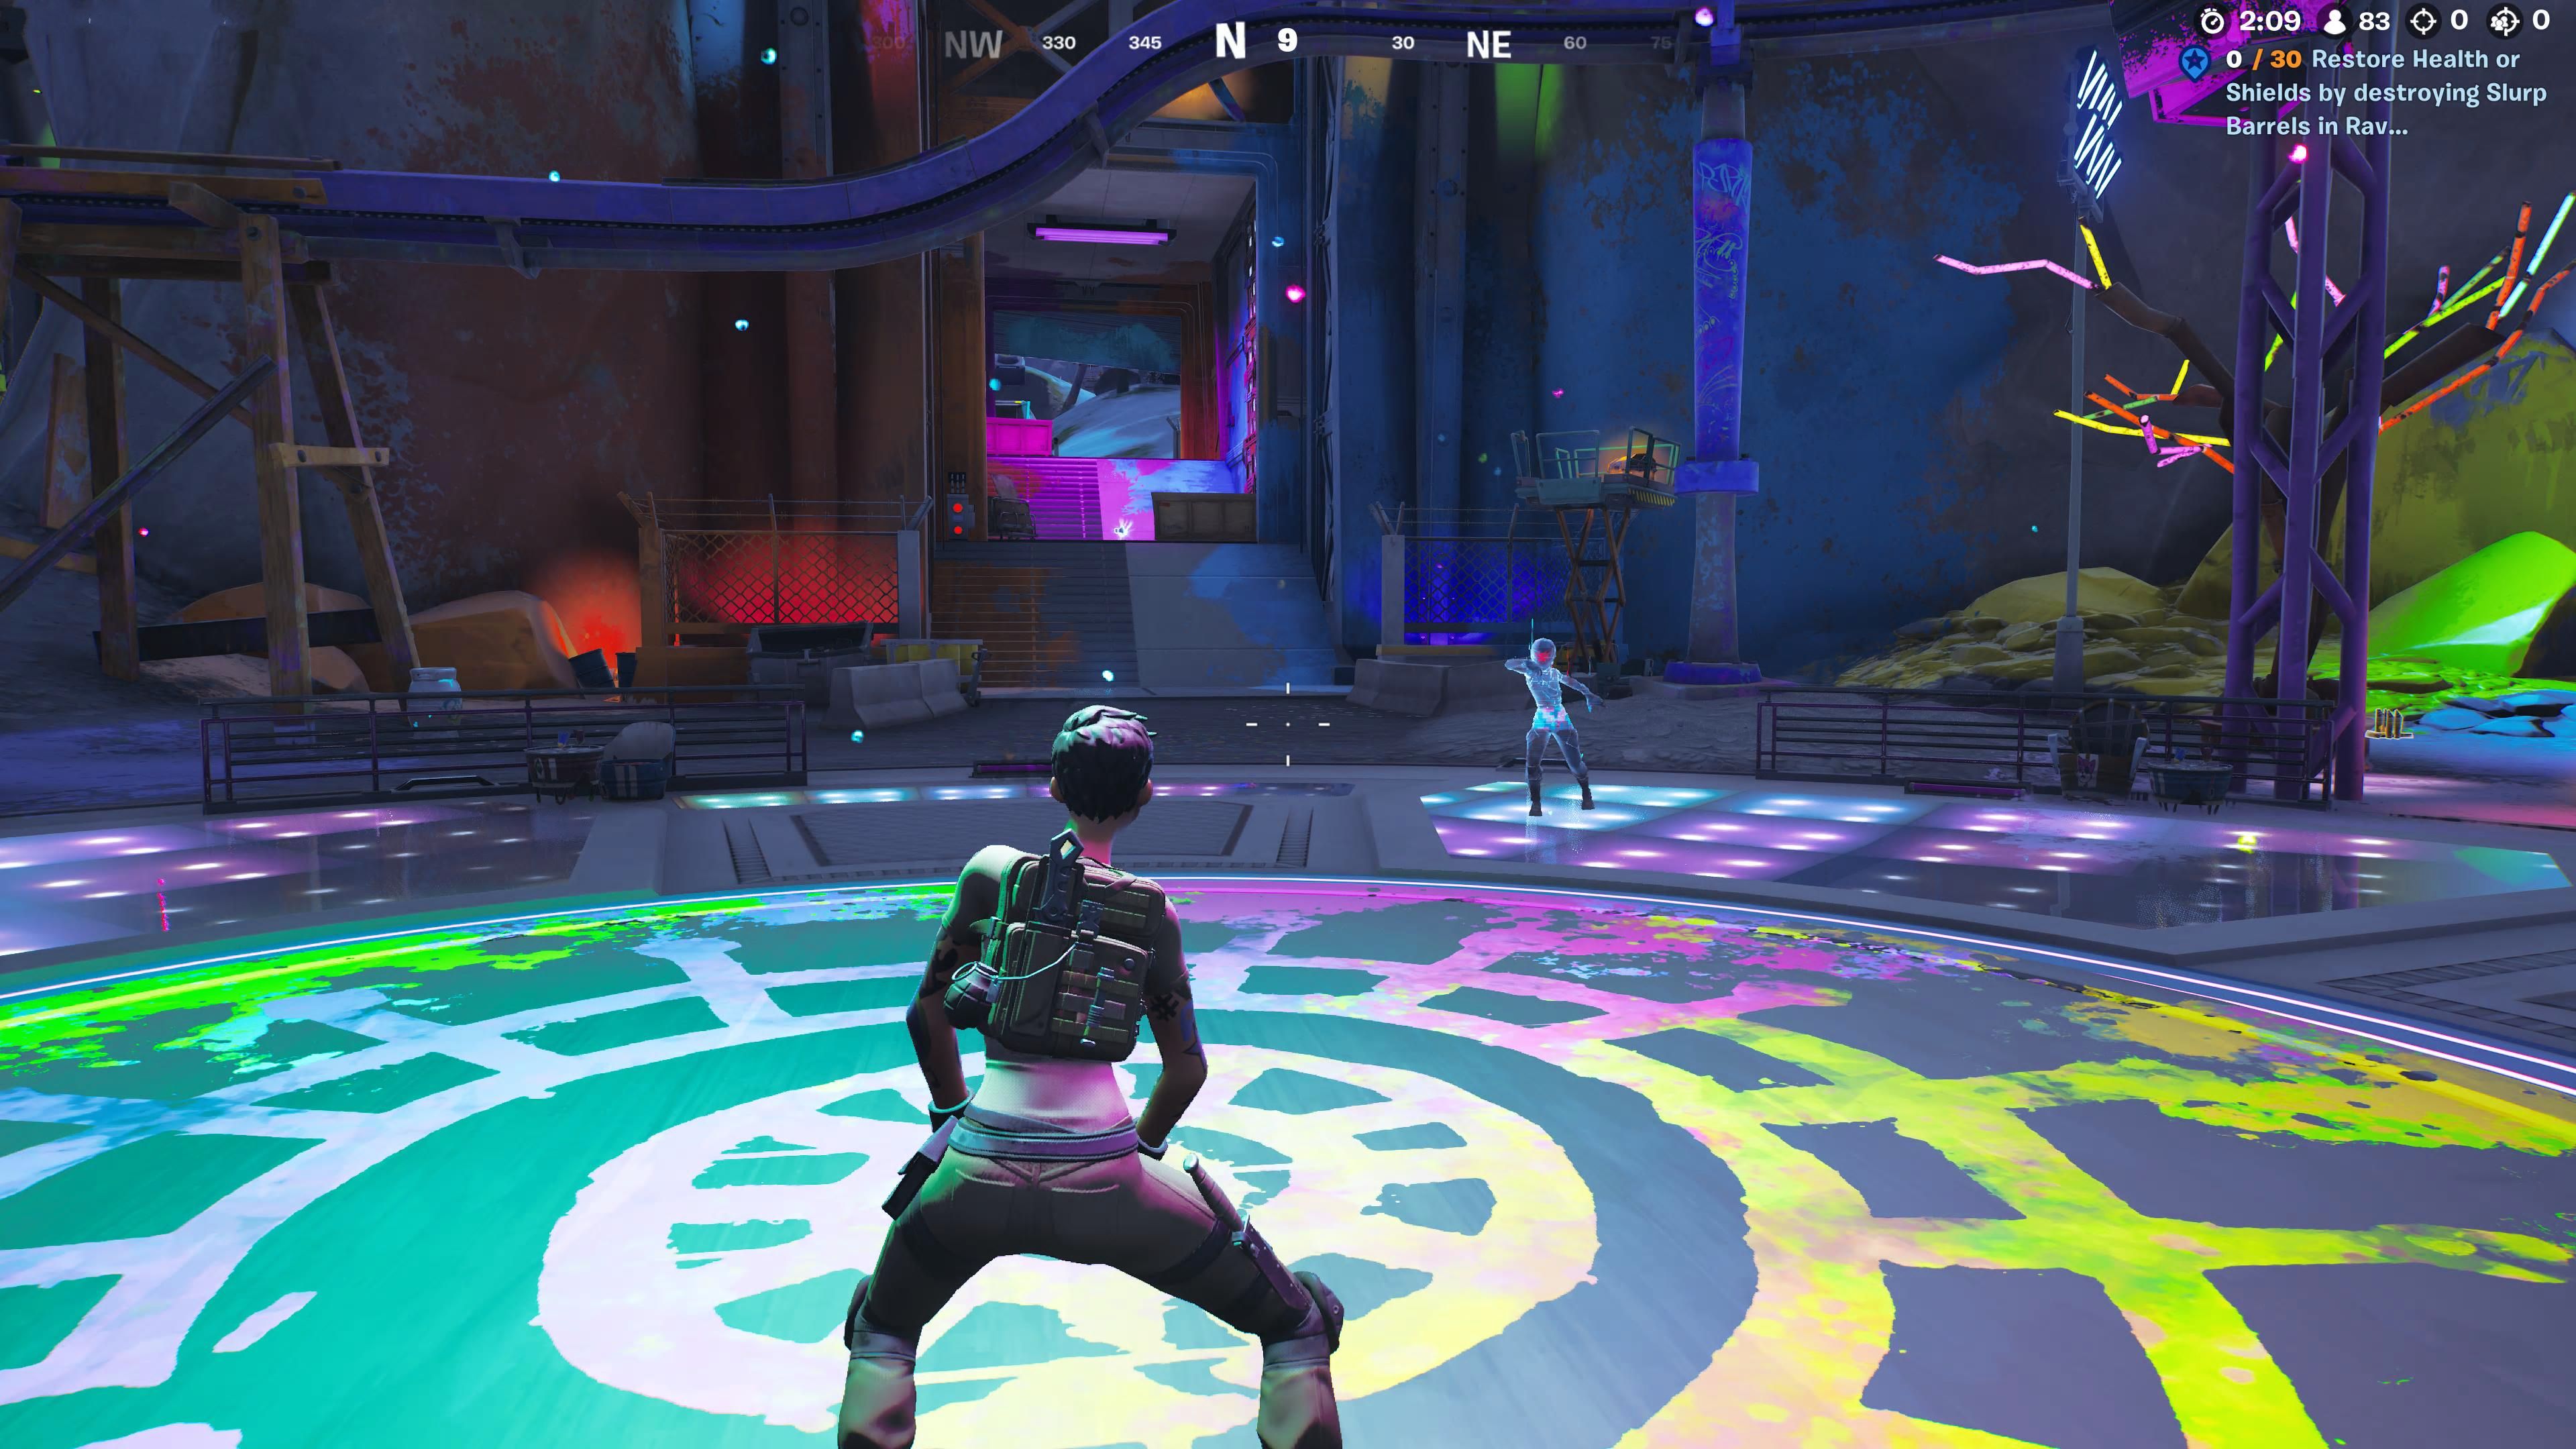
While players wait for Fortnite Chapter 3 Season 4 to arrive, they should take the opportunity to relax and let loose a bit, and this part of Vibin’ Part 7 encourages players to do just that. Players should head into Rave Cave itself and head for the dance floor. As the centerpiece of this whole location, it’s hard to miss.
Once players are on the dance floor, they can show off their dance moves to complete this objective. Even players with two left feet can complete this objective, as all Fortnite accounts come equipped with the free Dance Moves emote by default. In addition, players are free to use any dance emotes they’ve collected over Fortnite’s many seasons.
Restore 30 Health Or Shields By Destroying Slurp Barrels In Rave Cave
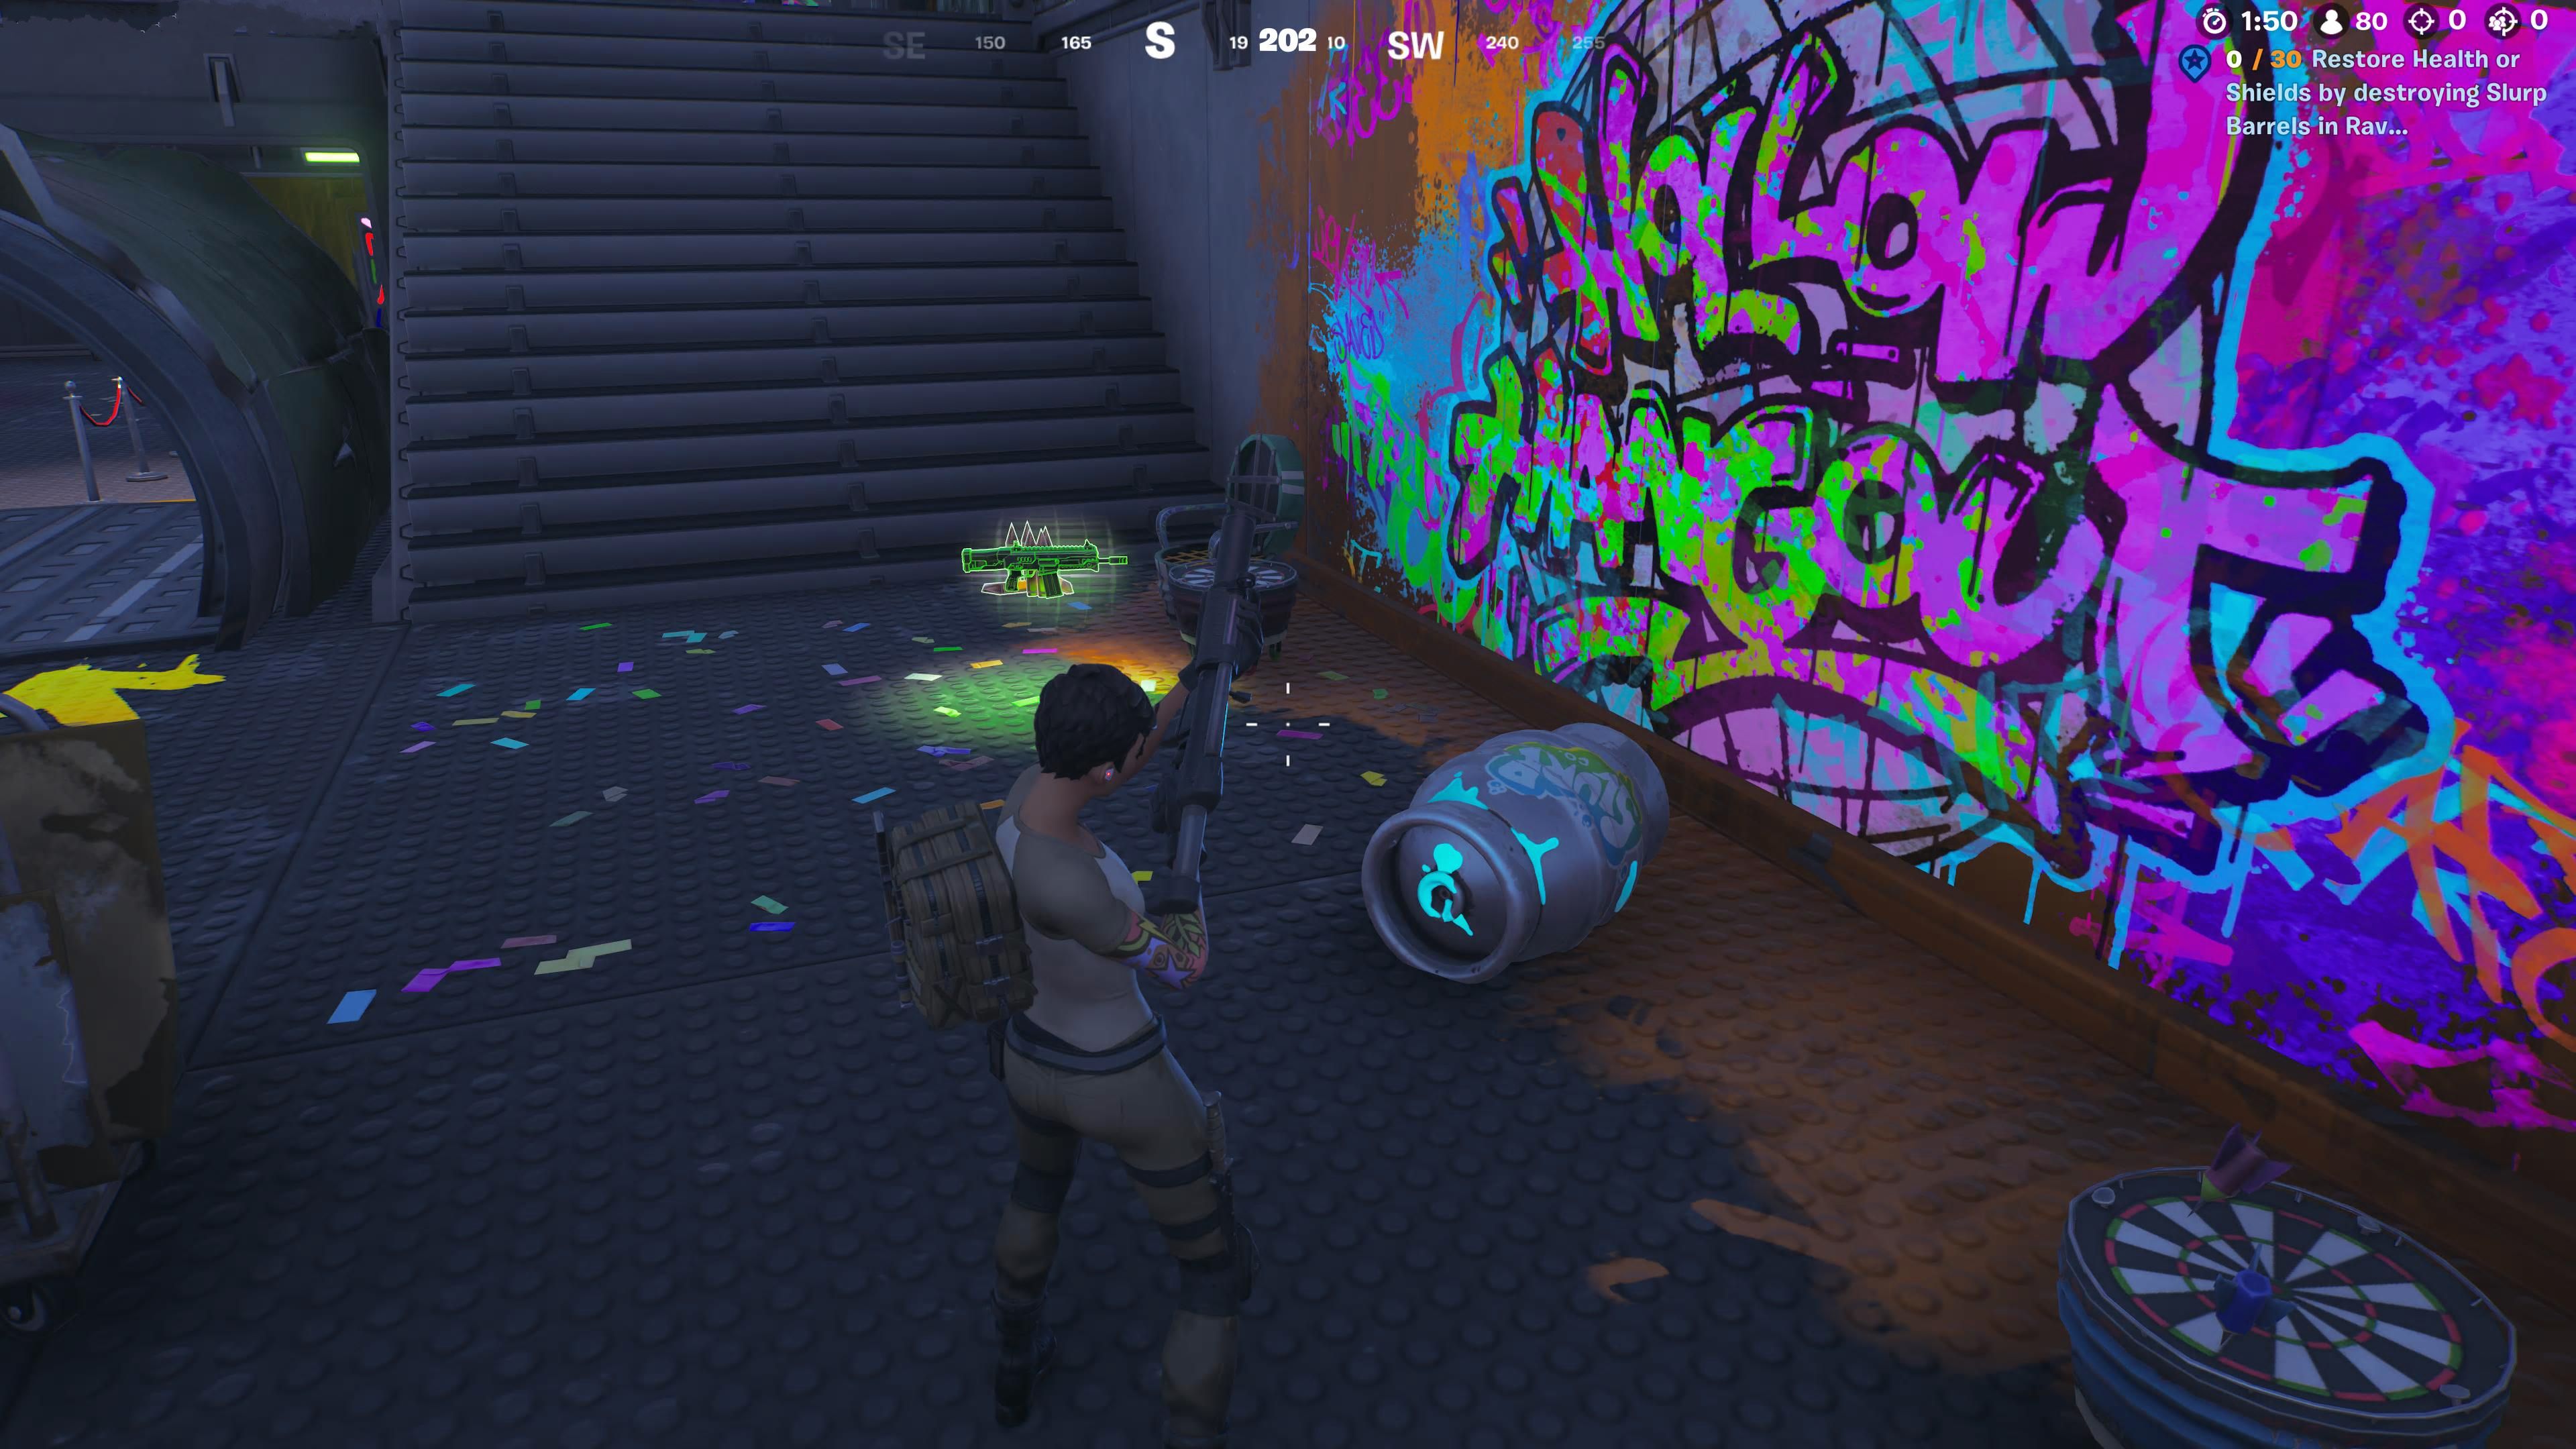
Once players have finished their dance challenge, they can take the opportunity to stop the music at Rave Cave and go searching for a way to cool off. Slurp Barrels can be found all over Rave Cave; when struck a few times, they will break, splashing players with Slurp and replenishing players’ health and shields.
Related: How to Enter a Wind Tunnel in a Baller in Fortnite
Players might be familiar with quests from the recent Fortnite x Dragon Ball event that tasked them with restoring health and, therefore, actually requiring them to take damage. Luckily, this quest doesn’t have any similar requirement, as smashed Slurp Barrels will replenish players’ shields as long as they haven’t yet maxed them out with potions and other items.
- 이전글Ασφαλιστικό Κρίση οικονομική κρίση Ντετέκτιβ Νέο «χτύπημα» από 17 βουλευτές της ΝΔ για το ασφαλιστικό 25.09.18
- 다음글πλακα πεζοδρομιου σκρουτζ Οδηγός για την Επιλογή και Χρήση 25.09.18
댓글목록
등록된 댓글이 없습니다.